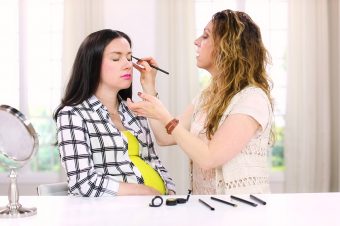
Most of us wear makeup every day, which means our brushes get a lot of use! Have you ever thought about cleaning your brushes? If you wait until you notice makeup buildup on a makeup tool, you are doing your brushes (and face!) a disservice. You will get a lot more mileage out of your brushes if you take care of them properly. Plus, a clean brush:
- Prevents facial breakouts caused by oil and dirt accumulation
- Removes the residual makeup causing uneven application
- Keeps brushes in pristine condition, slowing deterioration
- Reduces sensitive skin reactions from dirty brush buildup
You don’t need complex tools or brush cleaning ingredients to get a nice result. However, there are a few tips you should know for a much more effective cleaning process. This blog will cover the important steps of how to properly clean your brushes.
Shop DYT makeup brushes
How Often Should You Clean Makeup Brushes?
Before we even talk about the cleaning process, we need to discuss how frequently it should be done. There is such a thing as cleaning your brushes too much. If you clean your brushes too often, the cleaning process can loosen your glue and break down the bristles faster.
Most of us have to be careful not to wait too long between cleaning brushes because it is kind of a hassle to think about! When you clean your brushes, they shouldn’t look super dirty or coated in makeup. If you wait until they are really filthy, you risk causing facial acne and breakouts due to clogged pores.
Generally, you don’t want to wait longer than three months to clean your brushes. If you don’t wear a lot of makeup, then every three months is a good rule of thumb. On the other hand, if you wear a lot of makeup and use these brushes heavily, then cleaning them closer to every six weeks is ideal.
4 Steps to Keeping Your Makeup Brushes Clean
Here are four crucial steps to cleaning out your brushes and making sure they look as good as new.
STEP 1: Cleansing
I really like using baby shampoo because it doesn’t have many fillers or silicones that could coat the bristles. Any other gentle shampoo, hand soap (like Dial or Ivory) or dish soap (like original blue Dawn dish soap) would also work well for cleaning your brushes. If you use heavy and oily products, dish soap may be the best way to quickly break down the makeup buildup. There are also makeup brush cleaner products out there, but you don’t need to go out and purchase something special.
Use lukewarm water to avoid breaking down the bristles while still getting out the oils. Add some of this lukewarm water to the liquid soap or shampoo and then start stirring it together with your brush. You will see the soap begin to change color as the makeup loosens from the brush.
Move your brush in the same direction as the bristles-never smash your brush. You can dab the brush gently to help work soap up into the higher parts, but be very mindful of the bristles; bending them or dislodging them can result in a splayed brush later.
Do not let your brushes soak. Soaking your brush is one of the fastest ways to loosen the glue and warp the brush base.
Rinse out your brushes in running water or a bowl of water. You want to rinse them out until the water is clear. Even when you can’t see the makeup buildup, you need to keep cleaning if the water is cloudy. You can reapply more shampoo or soap after rinsing, repeating the process until the brush is truly clean.
STEP 2: Conditioning
If your brush bristles are looking dry, you may want to bring back the original luster with a conditioning step. I don’t always do this step since it can cause buildup itself.
After cleaning your brushes, mix a little bit of olive oil with a new dab of the same soap you used to clean your brushes. Work this mixture into the brush by stirring and dabbing like you did during the cleansing step. Let them sit in this mixture for just a couple of minutes.
Rinse thoroughly in lukewarm water, checking to make sure there is no oil or residue leftover after you are done. The result should be clean brushes with a softer feel than before.
STEP 3: Reshaping
Don’t just let your brushes dry any old way! The shape of your brush head helps you apply makeup to precise areas.
After cleaning your brushes and thoroughly rinsing them, use a paper towel to start the drying process. Gently use your fingers to shape the brush with the paper towel. Not only does this step remove a lot of the excess water to help speed the drying step, but it also gives you a chance to shape the brush.
For flat brushes, you want to make sure you are pressing gently with your thumb and forefinger to bring all the bristles down in the same direction until flat. You can then run your fingers gently along the short sides to make sure it doesn’t take on a fan shape.
For round brushes, you want to get them back to the same fluffy state they started in. Gently remove excess water with the paper towel from all angles and then shake a little bit to air fluff.
For pointy brushes, you want to restore the point once more so you can keep using it for eyeliner or lip liner. gently wrap the bristles in paper towel and slide up towards the brush tip from a few different sides, smoothing all bristles into a point with a rounded base.
STEP 4: Drying
Drying is easy. Simply set your brushes so they are hanging off the edge of the counter or table to air dry from all directions. Make sure you choose a place where they won’t get knocked off. A room with good air circulation and low humidity is best.
Drying could take anywhere from six hours to 24 hours. It might be best to clean the brushes right after applying makeup so you won’t need them until the following day. Do not put a wet brush back into a bag, or you could end up with mold. The brushes should feel smooth, fluffy and fully dry before you use them or put them away.
When is it Time to Replace a Makeup Brush?
If your brushes show discoloration or retain odors after you clean them, it is time to find a replacement. If the glue starts to loosen, you will notice a lot of shedding bristles when you try to use the brush. You also may need to replace your brushes if they get splayed out from use and are hard to reshape when you clean them.
It’s important to realize these brushes will need to be replaced, similar to how you replace your toothbrush. These brushes will not last forever like your hairbrush. Keeping this in mind will help avoid false expectations about your makeup brush mileage.
How to Prevent Makeup Brush Deterioration
Here are a few quick tips for brush care outside of the cleaning process:
- Choose quality brushes that will hold up
- Don’t keep them in cramped toiletry bags
- Use them gently when applying makeup
Find Brushes That Work and Last!
Are you in the market for new brushes? Our brushes are perfect for applying makeup and easy to clean with this method. Check out our wide selection of makeup brushes today at Dressing Your Truth.
Now that you have clean and ready makeup brushes, it is time to apply product! Put those brushes to good use with Quick Makeup Tips That Give Your Whole Look A “Wow” Factor.


